Thursday, June 27, 2013

New Locale, Less Space

 My new office has much less space for my trains. Sad, I know, but in 3 months I will have a new house with a dedicated train room! I still won't let my office stay train-less, so I build a small display shelf. It is a simple L-shaped shelf made from leftover shelf-work from the cubicle layout.


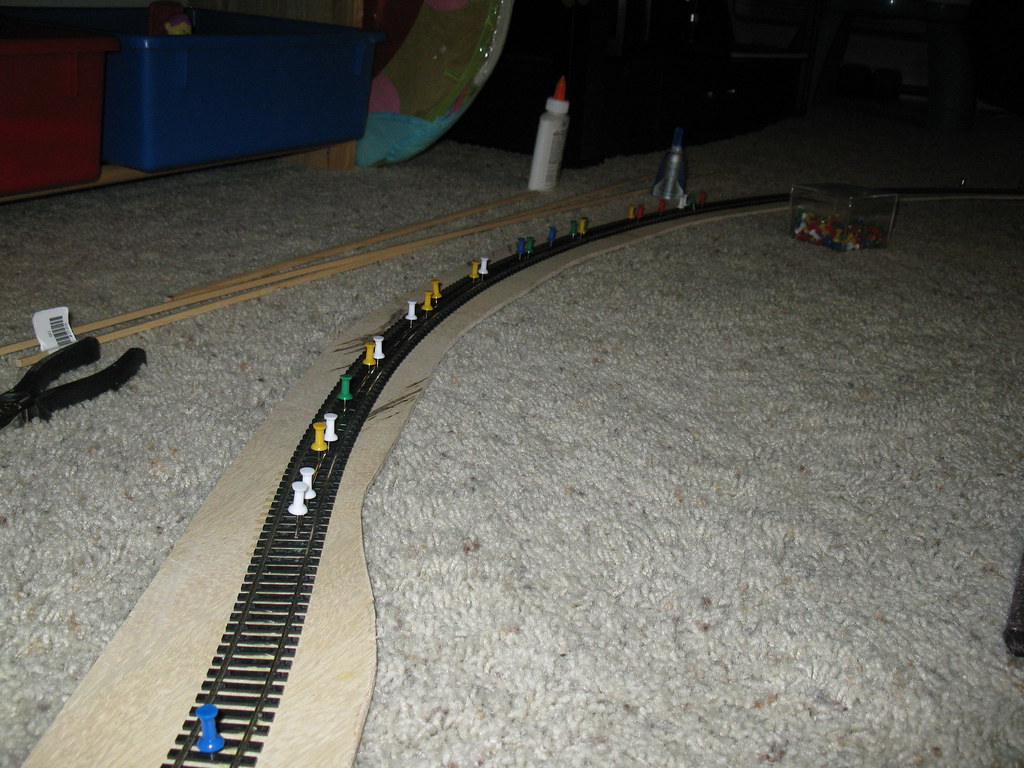
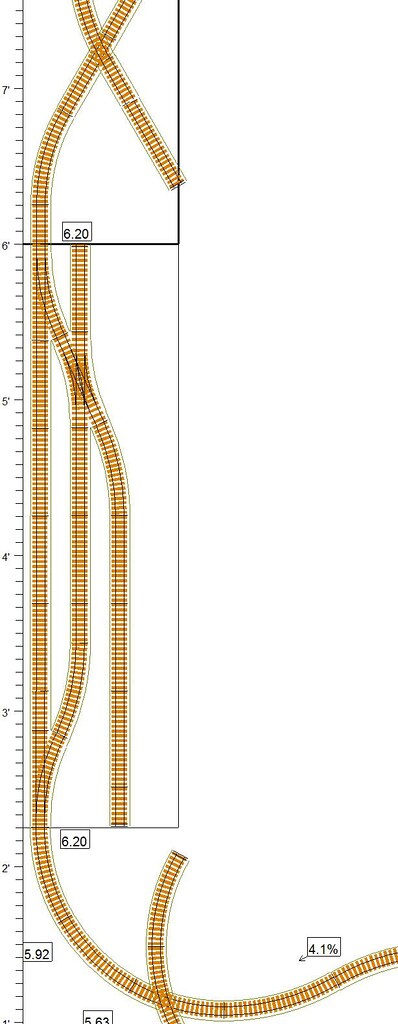
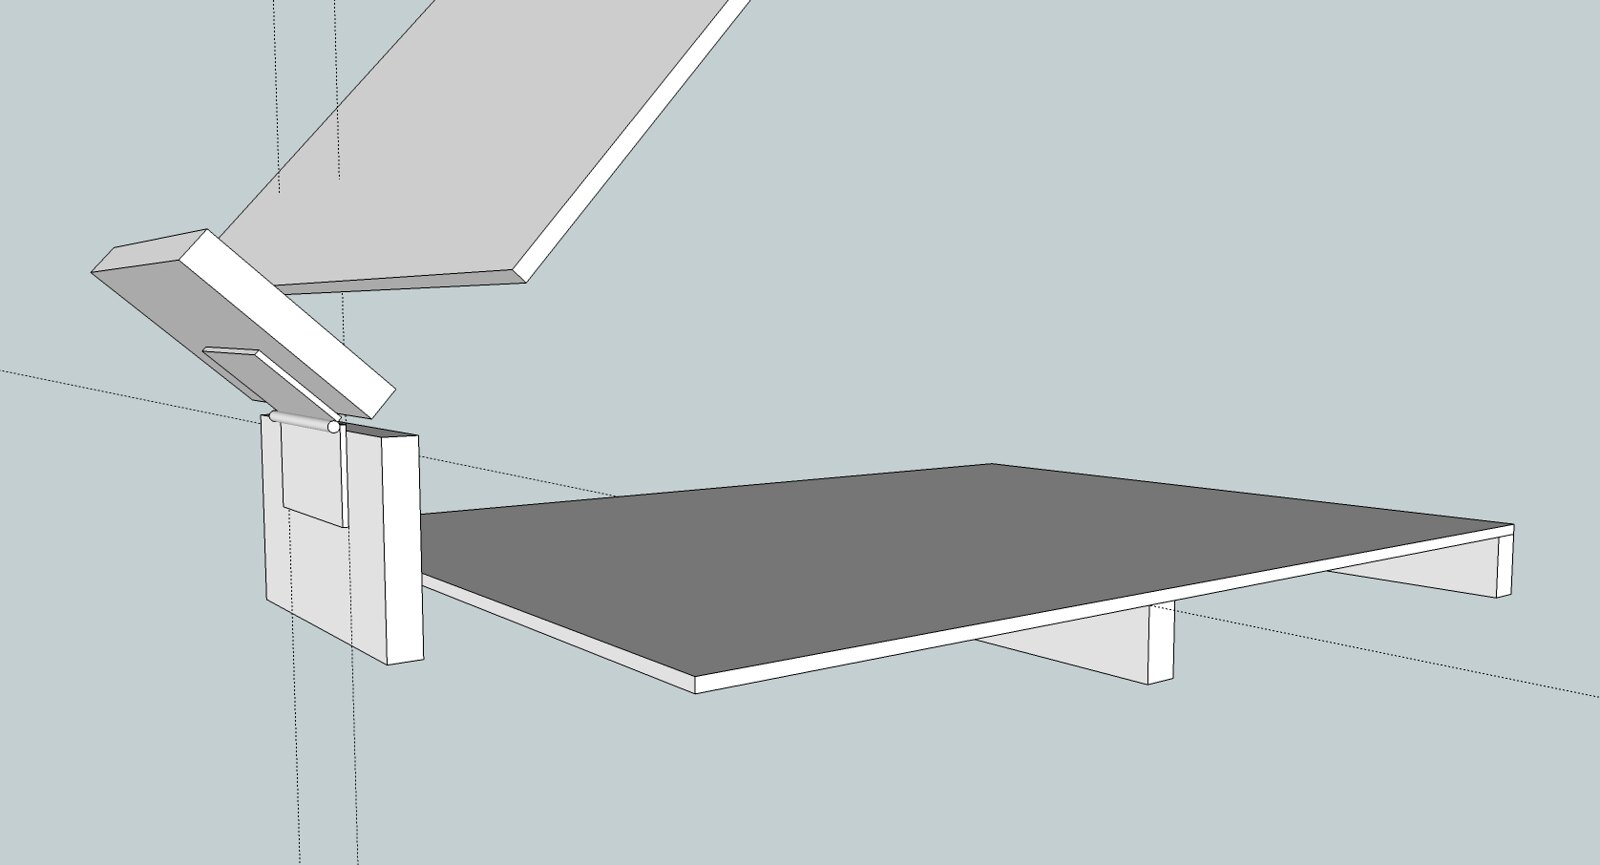
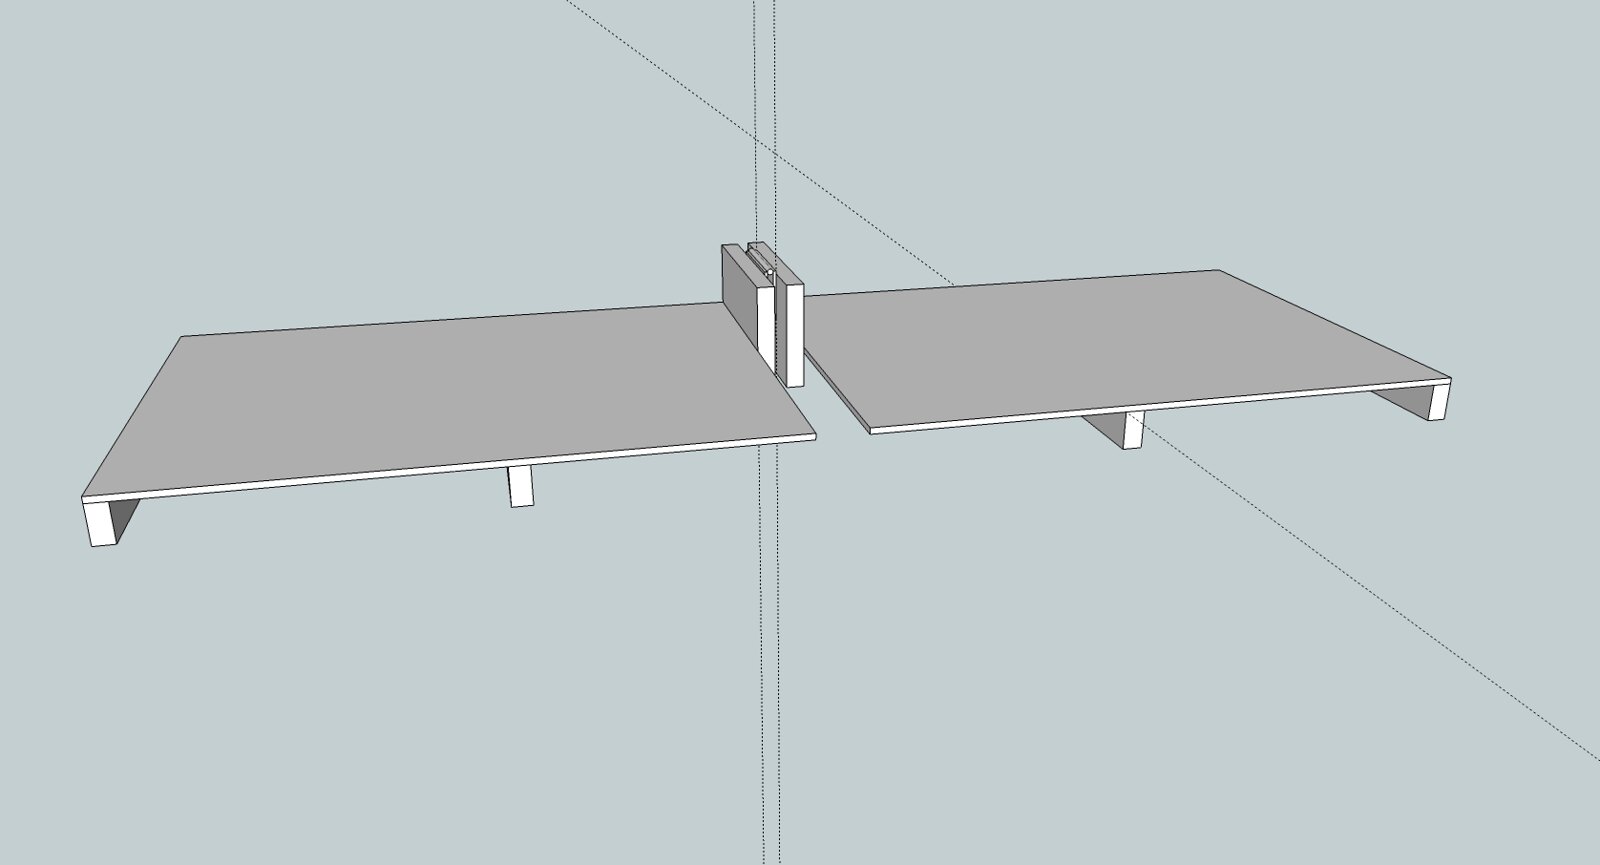
Instead of just slapping the track on the shelf, I created a tiered sub-roadbed from Expanded polystyrene insulation sheets. Yes, Styrofoam, not the pink stuff (Extruded polystyrene). If you have read my previous posts, you know I try to find the cheaper way to do things. However, this was not such a good idea. I should have listened to others' advice and avoided Styrofoam like the plague it is. It doesn't cut well, it gets static clinging pieces all over the place, and you can't get any detail out of it. I had to paint it to make it not shed its stuff anymore.


 But, now that its done, it is light, and looks good for a simple display shelf. I am not sure what kind of things to add besides trains and track. I was thinking about learning to do rock walls for the different tiers. This would be a perfect place to learn and try different materials and techniques. If you have any ideas for how to make the display look interesting or even a prototype area to look at, feel free to drop a comment!

 Hopefully over the next few posts I can start sharing some of my ideas for the new train room along with the progress of this display layout.

Thanks for reading,
Peter Lieber

Wednesday, February 6, 2013

First Run

Finally, I ran a train the full two loops, including the bridge!


Sadly this is pretty much as good as this layout is going to get.  We are moving in a few weeks and so this has to go. I will definitely keep the Landwasser Viaduct and possibly finish it on a new layout. The rest of the shelving probably will have to go.  The good thing is that I can improve on my design the next time around!

Thanks to all who followed with me in this process.  It was my first project that I wrote about like this. Until the next one starts, adieu!

Thanks for reading, Peter Lieber

Wednesday, January 30, 2013

Third Rail Bridge Track

Now that the bridge is completed, I need to run tracks over it.  This layout will move during its lifetime. It does, after all, hang on cubicle walls. With this in mind, I decided not to mount the track directly onto the bridge, but on a thin plywood deck that is placed on the bridge.


This bridge is a custom radius and so standard sectional track will not work. Flex track will work, but Marklin 3-rail flex track is very expensive at about $17 per meter. One of my goals for this layout (and life really) is to use materials I already have or purchase cheaper alternatives. I decided I would make my own 3-rail track.

Friday, January 25, 2013

Landwasser Viaduct

After finishing the full loop around my cubicle, the only real full loop was up and over my bookshelf. The lower track simply ended on either side of the bookshelf. This was just not good enough!


 How would I connect the two tracks across an almost 4 foot gap? I love problems like these. I can day dream for hours (spread over the whole day of course) about what this trestle, bridge, viaduct, causeway, or big mountain-side curve will look like.  I went through many revisions on paper and even more in my head. One of my favorites was a long, shallow trestle as seen below.

Tuesday, January 22, 2013

Lift-up Shelf

 I couldn't in good conscience not attempt to design a way to give unobstructed access to my cubicle. I decided to make the part of the layout that crosses over the entrance swing up and over on itself.  This is no ordinary lift up bridge. It is a complete part of the layout that lifts up, including two levels of track and scenery. To give enough clearance for the track and scenery, I offset the hinges with blocks of wood.


When up, the layout is supported by 1x2s hidden under the scenery.

Saturday, January 19, 2013

Cubicle Access? Trains? ... Trains!

And so it continues... my railroad won't stop growing.  I keep thinking of ways to make this a continuous running track.

Should I make a reversing loops at each end of the layout? It could be something like this:


My cubicle neighbors won't mind, right? As a wise man once said, "don't be ridiculous, you LOVE trains!" Well, I guess that may be over the line.

I could simply finish the last wall of my cube.  But how would it cross the entry?  A helix is ridiculous in this instance, but I can't just block the entrance to my cube.  Or can I...? I will go with the assumption that I can for now.


For this last wall, I will reproduce more faithfully the rail underpass located in the prototype as shown below.


This was fun to design as I had many ideas for the landscape: streams, waterfalls, canyons, rolling hills, etc.  Honestly, my vision of landscaping changed many times while building the track-work. Eventually, I decided that a simple hill leading to a canyon would do the trick. Probably way too compressed, but I like it!

Thanks for reading, Peter Lieber

Monday, December 17, 2012

Track Plan. Geometry Class

Ahh, the limitations and blessings of sectional track. Personally, I like it. I am able to easily try many different track configurations and reuse all my track. Sure, I can't do arbitrary or gentle curves, but this is a cubicle, and I don't have room for large radius curves anyways. The limited geometry is sometimes a blessing in disguise. If I could do anything I wanted, it would take me much, much longer to decide on a track configuration.

As I showed in my initial plan, I have a main terminus station with a freight depot and a locomotive maintenance facility.  My plans have morphed a little since then, with an additional station track and the elimination of the team track.  I eliminated the team track to save space.  The additional station track is the result of making the passenger terminal track alignment more realistic.

Marklin uses a very well defined track geometry, and as such there is a standard parallel track distance. Using the standard methods, a 3-track terminal would look like this:


Each track is separated equally.  This just doesn't look right.  In all the train stations I have been in, the tracks between platforms are always very close together. To hack the geometry, I changed it to this: